

I love the look of pre-made leather handles on a handbag but I don't love how pricey they sometimes are to purchase. In our book Just for You: Selfish Sewing there's a pattern for a handbag called the Crafty Satchel (designed by Sara Lawson) that calls for pre-made leather handles. Today I'm going to show you how to make DIY "pre-made" handles that you can use as an alternative to purchased leather handles.
Perfect Fabric Purse Handle Tutorial
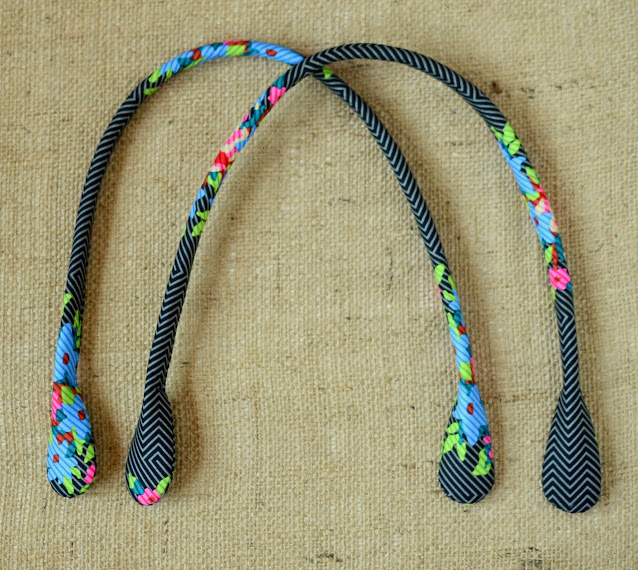
All you need is fabric and a little Soft & Stable interfacing. Here's what they look like on the Crafty Satchel I sewed up for Purse Palooza.
.JPG)
These handles are perfect for using with the Crafty Satchel pattern from our book but you can customize them for any pattern that calls for pre-made handles. They are sturdy and soft and can be as colorful as you want them to be. Okay? Let's get started. The pattern calls for 28 inch handles so that's what my measurements are based on. Adjust the length measurement of each cut as needed.
You'll need...
1/4 yard of quilting cotton2 strips 2'' x 28 1/2'' of Soft & Stable (fabric covered foam batting) this is the same interfacing used in the bag pattern, you may even have enough leftover to use.
Large spool of thread or circle measuring 1 1/2 '' in diameter
Fabric pen
Quilt binding clips
Cut...
4 strips 2'' x 28 1/2'' from the quilting cotton2 strips 2'' x 28 1/2'' from the Soft & Stable

Sewing...
1. Stack 2 strips of quilting cotton with right sides together and place 1 strip of Soft & Stable on top. Pin the 3 layers together.2. Place a large spool of thread 1/4'' from an end and in the center, and draw a half circle. Trim the corners off leaving 1/4'' around the line. This will be your stitch line. Stitching right on the line will give you a perfect curve every time. Repeat for the opposite end.

Here's a view of the layers...

3. Start in the middle of one long sideand sew around all the sides with a 1/4'' seam allowance. Leave a 3'' opening for turning.

4. Cut little triangle notches out of each curved end.

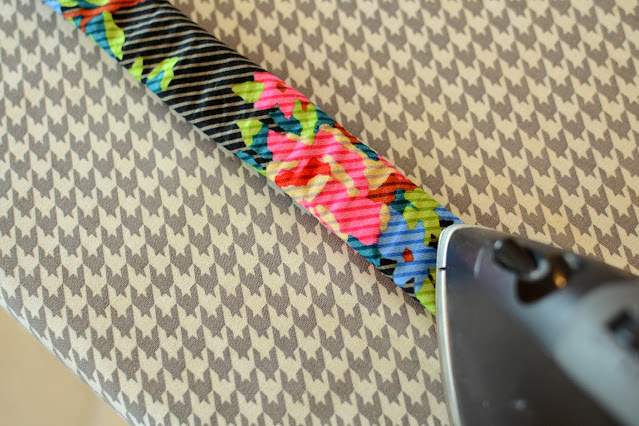
5. Turn the handle right side out. You'll notice that one side of the handle feels "puffy" from the foam batting. Place the puffy side down on an ironing board and press the side seams flat. This takes a little wiggling to make sure the side seams are exposed and in the right place.
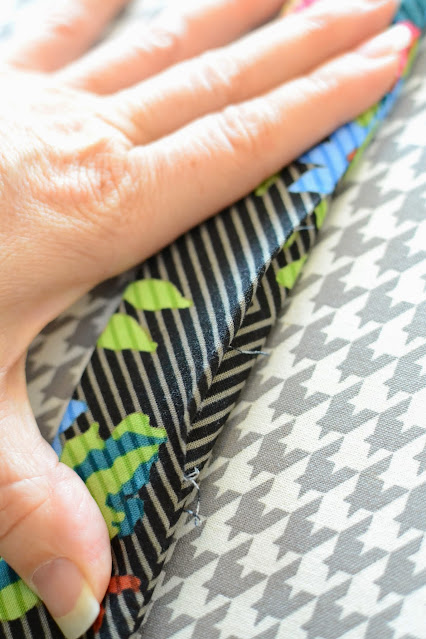
7. Starting at the center opening, fold the handle in half matching the side seams and clip in place with a binding clip. Make sure the "puffy" side is on the outside of the fold. If you don't have binding clips, clothes pins will work here too.
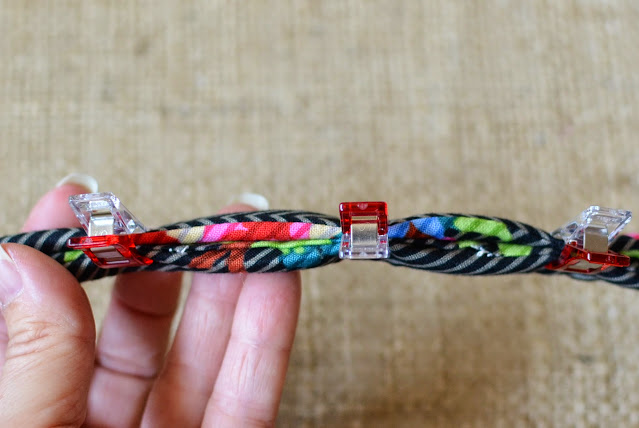
8. Continue to fold and clip every 2 inches. Stuff the extra fabric to the inside as you fold to get the seams to line up just right.
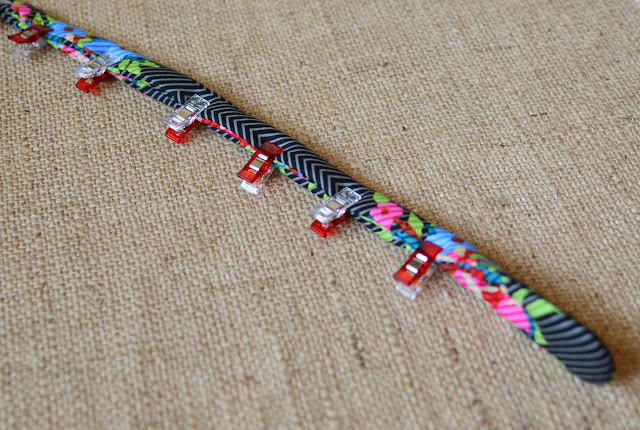
9. Make a mark 3'' from each end (see the white dot in the photo below). You can mark it with a pin or a little piece of washi tape. These points will be your starting and stopping points for stitching.
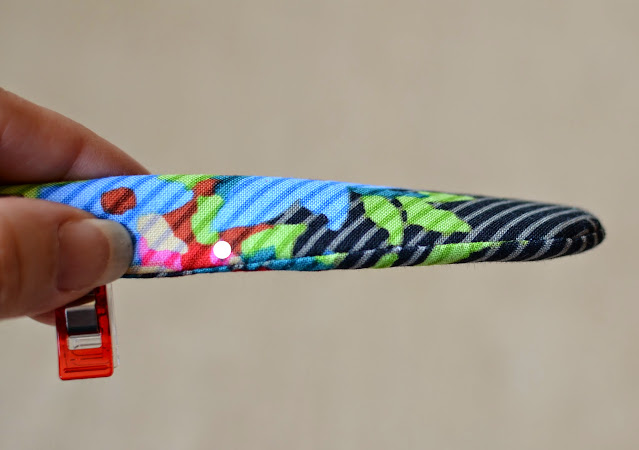

6. Tuck the raw edges of the opening inside and press to make a nice crease.


8. Continue to fold and clip every 2 inches. Stuff the extra fabric to the inside as you fold to get the seams to line up just right.

9. Make a mark 3'' from each end (see the white dot in the photo below). You can mark it with a pin or a little piece of washi tape. These points will be your starting and stopping points for stitching.

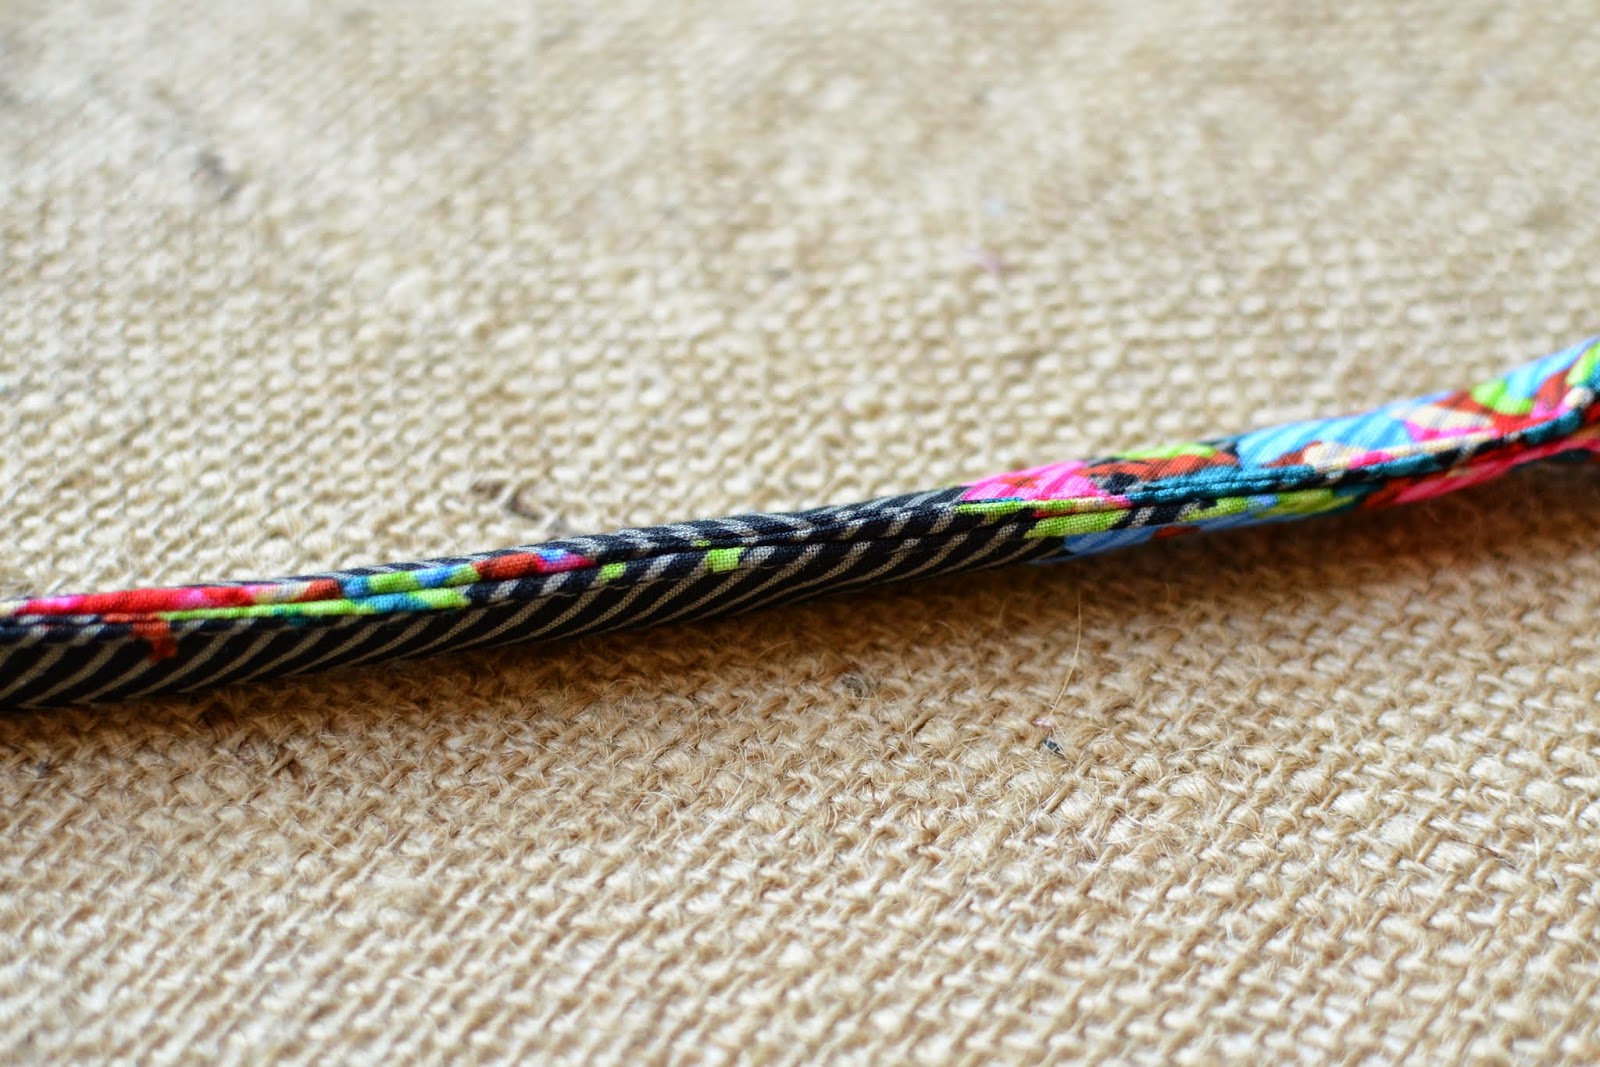
10. Starting at one point, stitch back and forth a few times and sew about 1/8th inch away from the edge. Sew all the way to the other end backstitching a few times.

TIP: Instead of taking each clip off when I sew up to it, I slide it down to help hold the middle parts in place before I get to the next clip.

11. Clip your threads and take a look at your handi work. Don't worry if the stitching doesn't look quite perfect. I promise no one will ever notice. They'll only be looking at the outside facing part of the handle which is smooth and perfect.
12. Repeat for the other handle. Now you are ready to stitch your perfect handles to your bag. You can even use a sewing machine to sew them on.
If you make a Crafty Satchel I'd love to see it. Join our Just for You Sewlebrity Sewalong facebook group and show it off.
TIP: Instead of taking each clip off when I sew up to it, I slide it down to help hold the middle parts in place before I get to the next clip.
11. Clip your threads and take a look at your handi work. Don't worry if the stitching doesn't look quite perfect. I promise no one will ever notice. They'll only be looking at the outside facing part of the handle which is smooth and perfect.
12. Repeat for the other handle. Now you are ready to stitch your perfect handles to your bag. You can even use a sewing machine to sew them on.

If you make a Crafty Satchel I'd love to see it. Join our Just for You Sewlebrity Sewalong facebook group and show it off.
Happy sewing!
Like my style? Check out my Blue Susan Etsy Shop where you'll find more beautiful handbags and easy-to-read PDF sewing patterns for sale.
Like my style? Check out my Blue Susan Etsy Shop where you'll find more beautiful handbags and easy-to-read PDF sewing patterns for sale.
Thank you. I was wondering how those were made.
ReplyDeleteThis comment has been removed by the author.
ReplyDeleteNice idea--I will definitely put this on my list of things to try.
ReplyDeleteDo you have any specific way you use to turn the handles right side out? That would be helpful to know! :)
Thanks so much for this tutorial!
Krista
I use a bamboo skewer stick. Start at each end and turn out the right side in the center where you have your opening. You can also use the stick to round out the curved ends.
DeleteThanks for this excellent tutorial!
ReplyDeleteSusie
Freakin' awesome! Thank you!
ReplyDeleteYou are a GENIUS!!!!!! Thank you so much for sharing you with us!
ReplyDeleteThank you for sharing! Always good to be learning!! : )
ReplyDeleteThank you for sharing! Always good to be learning!! : )
ReplyDeleteThese handles are AMAZING. I've got a Craft Gossip post scheduled for later today that links to your tutorial:
ReplyDeletehttp://sewing.craftgossip.com/tutorial-make-your-own-fabric-purse-handles/2015/03/20/
--Anne
Excellent tutorial. Thanks for this.
ReplyDeleteThanks for sharing! I need to make a new bag and I've always wondered about these!
ReplyDeleteHi,
ReplyDeleteAwesome idea, where can you buy the Soft and Stable, I have never seen it .
Thank you
Soft & Stable is carried at local fabric stores but you can also buy it online directly from the manufacturer byAnnie. http://www.byannie.com/shop/category/byannies-soft-and-stable/?gclid=CJ-iwImss8QCFWFp7AodfjMAHQ
DeleteI managed to get this from cotton patch in the uk
DeleteHi,
ReplyDeleteLove your site......but does it have Print Friendly ?
Thank you
Sorry, there is not a printer friendly version for this tutorial. :)
DeleteI've often just highlighted, copied and paste to a word document. It works 99% of the time. :)
DeleteIt even copies the pictures. Hope this helps.
Hi, thanks for this great tutorial!
ReplyDeleteOh my, I love how easy it is to make these cool handles! I never would've thought to make them like this! :) Lisa
ReplyDeleteI love the idea. Thanks for sharing. I too would never have thought to make them this way!!!!
ReplyDeleteJust genius. They don't look handmade at all. Can't wait to try.
ReplyDeleteJust genius. They don't look handmade at all. Can't wait to try.
ReplyDeleteThank you for sharing one of the most precise tutorials
ReplyDeleteGreat tutorial! Thank you from Belgium!
ReplyDeleteSo Perfect Fabric Purse for women. I like to use this also. Thanks for great share.
ReplyDeletepurses
Do you remember where you go the fabric from? I love that fabric!
ReplyDeleteYes Rennie. I love it too. It is from Anna Maria Horner's Dowry line. All the fabrics from that line are beautiful. Actually I love everything she does. Here's a link to it https://www.etsy.com/listing/252895092/anna-maria-horner-dowry-twill-bouquet?utm_source=google&utm_medium=cpc&utm_campaign=shopping_us_a-craft_supplies_and_tools-fabric&utm_custom1=53117d52-c09d-40ec-b709-237484c12493&gclid=CN_L9OGvr80CFRY7gQodInoJZg
DeleteThis comment has been removed by a blog administrator.
ReplyDeleteThank you for this perfect tutorial
ReplyDeleteThis is great and can be use on so many bags!! Thank you
ReplyDeleteWOW ! I love these handles .
ReplyDeleteI have been curious about how to make them .
Thanks for posting . I will start right now.
Very informative
ReplyDeleteI will try it soon.Thanks for sharing.
I'm learning to sew and have wondered how to make the "rolled" handles. Excellent job on explaining and demonstrating. Thank you.
ReplyDeleteThank you so very much! I’m putting these handles on a knitted/felted wool bag I made years ago but could never find the right handles! They’re going to be perfect.
ReplyDeleteThis comment has been removed by a blog administrator.
ReplyDeleteThis comment has been removed by a blog administrator.
ReplyDeleteThis comment has been removed by a blog administrator.
ReplyDeleteThis comment has been removed by a blog administrator.
ReplyDeleteI think I can use this with faux leather. Thank you so much.
ReplyDeleteYou can do it with leather but it's considerably more difficult (I think, I didn't try it with fabric). I followed these instructions when trying to make a new handle for one of my tote bags, https://www.atitlanleather.com/collections/handmade-leather-bags/products/tote-bag. With so many folds you really need to thin out the leather to be really thin and even then it's difficult to sew.
DeleteHow can I save this. I know I will never remember how to do it otherwise.
ReplyDeleteI love this! I've been trying to figure out how to do this for quite a long time! Can you explain how to turn it right side out though? That looks like it would be difficult to do. Thank you!
ReplyDeleteI was able to turn it right side out over the blunt end of a chop stick. I am not sure I can explain it clearly but I pulled the seam allowance down over the chopstick with a needle nose pliers, The pliers are able to grip the fabric better than my fingers. The handles turned out beautifully. What a great tutorial!
ReplyDelete