
I am back from Colorado and I have lots of makes to show but I'm being a lazy blogger and all I want to do is sew this quilt. I don't love quilting, it's such a daunting task. But I love how it is turning out I just want to get it done.

As you may have imagined I didn't get a whole lot of sewing done in CO, too many other fun distractions. But I did get all my strips cut out, which is a huge deal. I decided to sew up my queen size quilt similar to this one by Anna of Noodlehead's . I'll put the herringbone blocks in the center and then 2 other fabrics on the sides. I figure I need 35 blocks, way less work than the 49 I was thinking I needed before. I added a few more fabrics too.

.JPG)
I had some trouble with the template lining up the way it was supposed to so I came up with an alternative method to get the same results. If you are doing the sew along and are having the same problem here's what I did.
The original instructions are to align the left corner of the ruler/template with the intersection of the edge of strips 2 and 3. Then align the right corner of the ruler with the edge of strip 1.
 |
| photo from Bijou Lovely |
I was having a hard time getting the corner of my template and 2nd seam to line up so that I didn’t have any holes along the left side of my block.

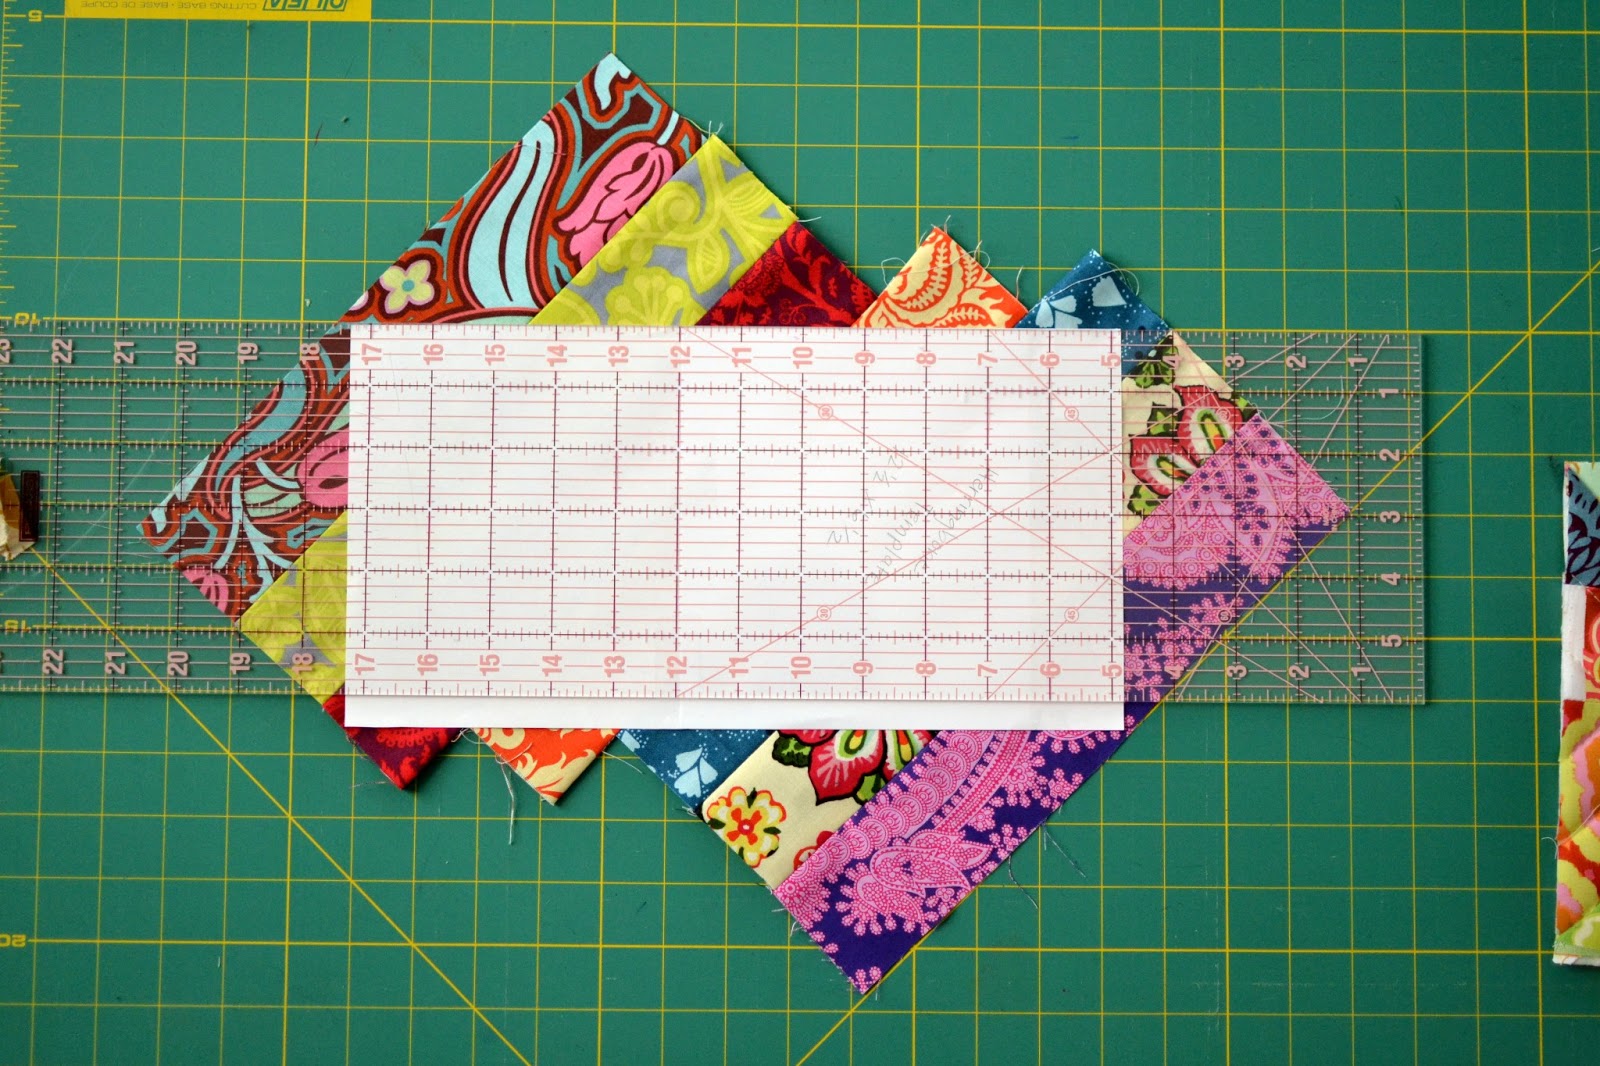
I decided to float the template around until it fit inside the material. To keep my blocks consistent I made sure to always line up my template at a 45 degree angle. There are two ways to do this. You can line up one side along a grid line, and align your template on a 45 degree angle using you ruler to match the 45 degree marking on your grid.
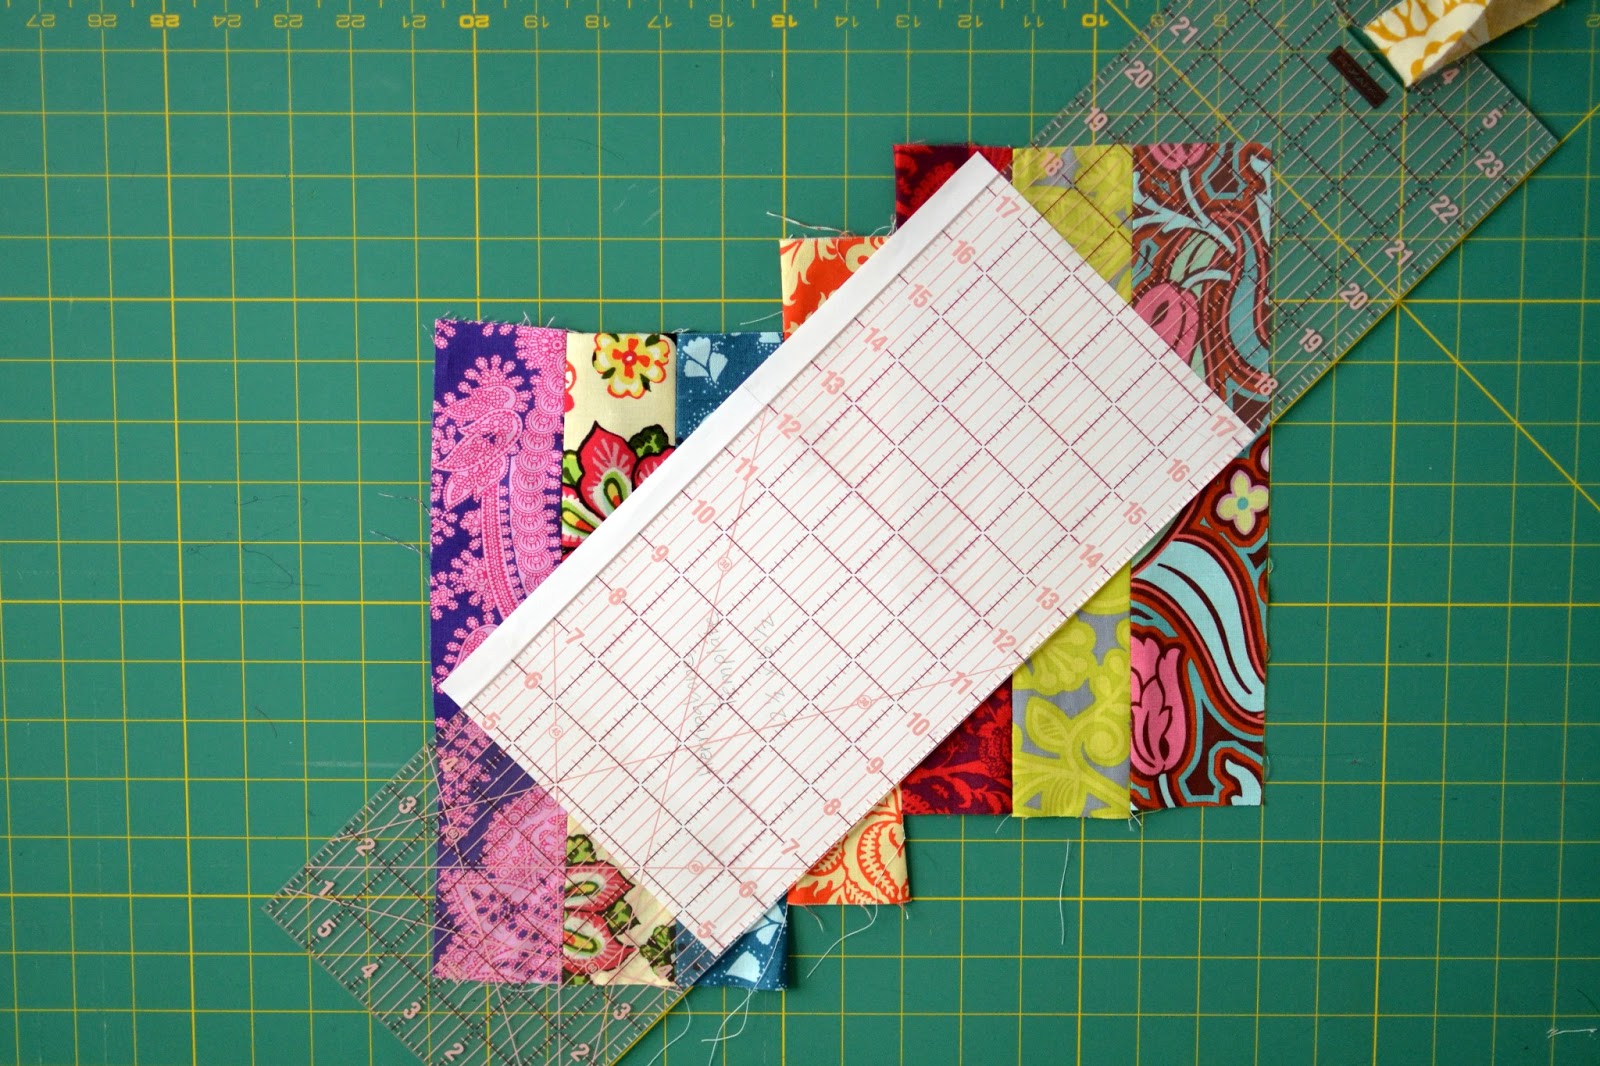
Another way to do it is to place one side of your sewn strips along the 45 degree marking on your grid and line up your template with the inch lines on grid using your ruler as a reference.

Okay back to reality, It's almost time to get the rest of the kids from school.
I always disliked quilting because I hated geometry so much, I think. It could also be because it requires exactness and that is not my strong suit. This looks awesome though, and kudos to you for bring sewing along on a trip.
ReplyDeleteThis looks really good! Thanks so much for the tips! I am pinning this as I intend to have a go at this pattern - I won't make the January challenge deadline but I will get there!
ReplyDeleteGreat Tips for getting that 45 degree cut consistently. Another way to make sure to match up pairs is to use the First Half as the pattern for the Second Half. Just flip it over with right sides together and matching seams.
ReplyDeleteYour fabrics are gorgeous. What a pretty bed quilt you will have when finished. I'm done with the Butterfly Bundle and getting ready to quilt the Aztec Bundle.
Thanks for visiting CITexas Gal and leaving a comment. See ya on Facebook. Keep up the great sewing.